Mistakes happen when developing in ServiceNow. One common hiccup for developers and administrators is making updates in the wrong update set, or even the wrong scope. Fortunately, ServiceNow provides a straightforward way to correct such mistakes using the sys_update_xml table. This guide will walk you through how to address these errors, ensuring your changes end up in the right place without losing any work.
Note: This is only applicable for configuration records (business rules, ui action, script includes, ACLs, etc). Data changes are not capture by default in update sets – i.e. Changes to group member/roles etc.
Understanding the sys_update_xml Table
The sys_update_xml table in ServiceNow stores records of all changes made to the system. Each record in this table corresponds to a modification you’ve made, storing details such as the XML representation of the change, the update set it belongs to, and more. By manipulating records in this table, you can move updates between sets or adjust the scope of the changes.
Step 1: Access the sys_update_xml Table
- Navigate to the
sys_update_xmltable by typing ‘sys_update_xml.list‘ in the navigation filter of your ServiceNow instance and press enter. This will bring up a list of all updates.

Step 2: Identify and Select the Incorrect Update
- Use the search function in the list view to find the update you mistakenly added to the wrong update set. You can search/sort by the following to help find the specific update record:
- Update set – filter by the update set you incorrectly made the update in
- Updated by – filter by the developer which made configuration in the wrong update set
- Updated – sort by most recently updated to find the your update
- Application – filter by the application scope the update was made in
- Target name – search by the display name of the configuration record
- Type – filter by the type of configuration record (script include, business rule, ACL, etc)
- TIP: A quick way to find the related
sys_update_xmlrecord is to search the “Name” column by thesys_idof the related configuration record with the “*” search-wildcard:

Step 3: Move the Update to the Correct Update Set
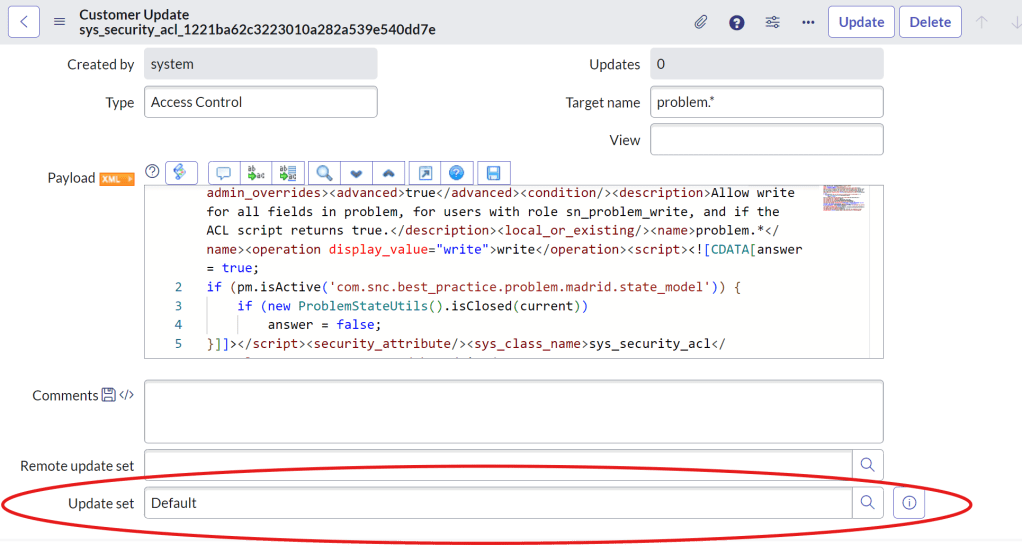
- Open the record you need to change.
- Find the field labelled
Update Setand update the Update Set name with the correct update set. - Save the record. This action moves your update to the correct update set
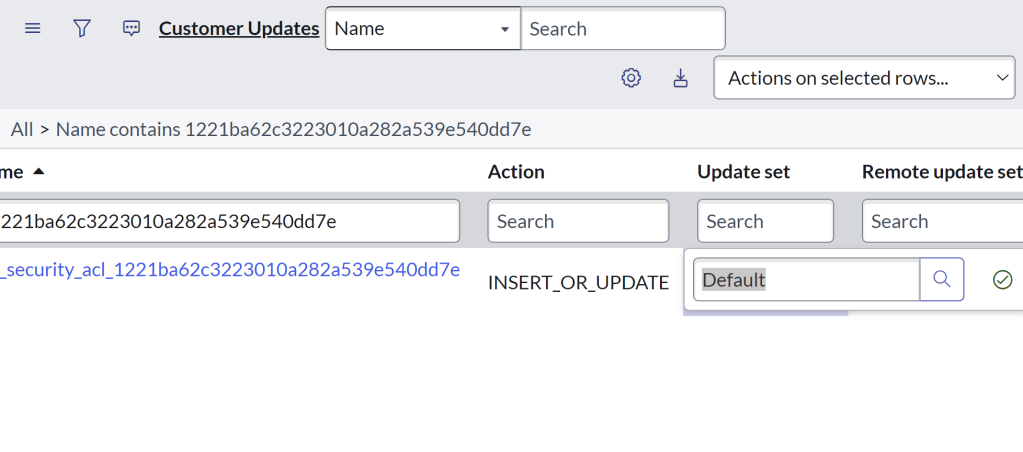
TIP: Alternative you can update the Update Set field directly in the list view by double-clicking the cell of the Update Set value:
What If the Update Is in the Wrong Scope?
If you find that an update has been captured in the wrong scope and update set, correcting this is critical for ensuring your changes are correctly applied within the intended areas of ServiceNow. Here’s how to properly reassign both the scope and the update set:
Step 1: Navigate to the Affected Record
First, directly go to the configuration record that was incorrectly updated—whether it’s a business rule, script include, or any other configuration item (not sys_update_xml record) .
Step 2: Change Scope and Update Set
Within the record:
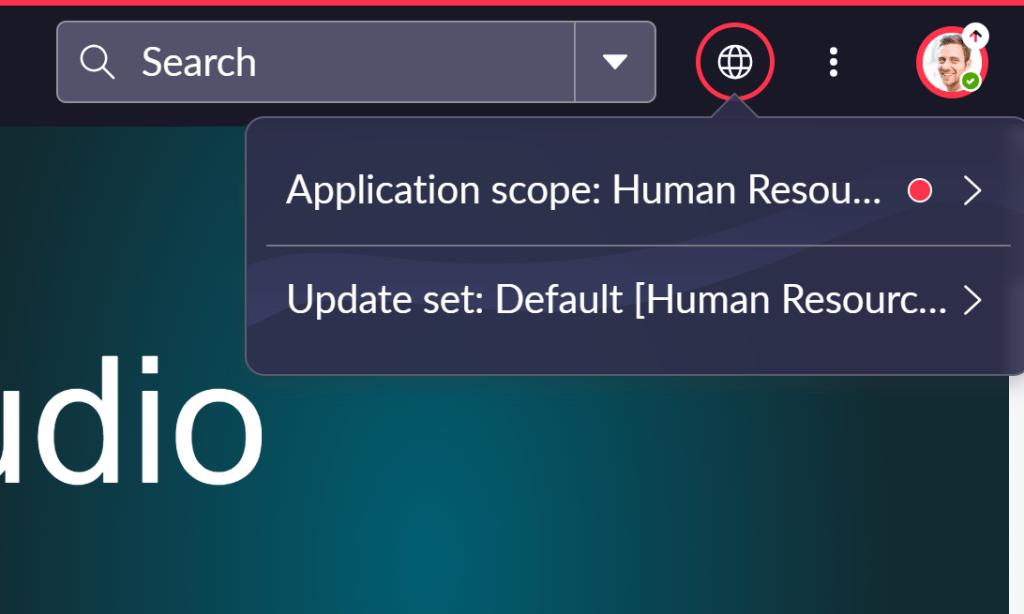
- Change to the current Application Scope to the correct scope.
- Note: You will see that the configuration record becomes greyed-out as your current scope does not match with the scope of the.
- Ensure the correct Update Set is also selected from the available options. This ensures that the update is both scoped correctly and included in the correct set for deployment.
Step 3: Use “Insert and Stay”
Once the scope and update set are correctly set:
- At the top of the configuration record, right click and select “Insert and Stay” option.
- This action duplicates the record within the correct scope and update set while retaining the original record *temporarily*. This step is crucial as it allows you to verify the changes without losing the original setup.

Step 4: Test and Verify
Before proceeding to clean up, it’s vital to test the newly adjusted record:
- In the original update set/application, make the original configuration record inactive.
- Ensure that the new record operate as expected in the new scope and update set.
- Check for any functional discrepancies or errors that might arise due to the change in scope or update set.
Step 5: Clean Up
Once you have confirmed that the new record functions correctly:
- Return to the original record in the old scope and update set.
- Delete this original record to prevent any confusion or accidental deployment of outdated configurations.
Conclusion
Mistakes in update sets or scopes need not be catastrophic. With the right knowledge of how to use the sys_update_xml table and understanding of scopes in ServiceNow, you can quickly rectify such issues. Remember, always double-check which update set and scope you are working in before starting your changes, and keep regular backups of your work to avoid any major setbacks.
This guide should help you feel more confident in managing your ServiceNow updates efficiently and effectively, ensuring that your developments proceed smoothly and accurately within your intended configurations.


Leave a comment